Using Office 365 online archiving and retention policies
Each Office 365 email enabled account features an Online Archive mailbox. An archive mailbox is a specialised mailbox that appears alongside the user's primary mailbox folders in Outlook, or Outlook on the web (previously known as Outlook Web App, or OWA). Users can access the archive in the same way that they access their primary mailboxes.
The Archive Policy defines when an email will be moved from your personal mailbox to the online archive. The Retention Policy defines when an email will be deleted. This article primarily addresses the Online Archive policy, but notes are added where applicable to cover the Retention Policy too.
Sections include:
- Features of the Online Archive mailbox
- Moving messages to the Online Archive mailbox
- Setting up an Archive Policy using Outlook on the web
- Setting up an Archive Policy using Microsoft Outlook 2013 & 2016
Features of the Online Archive mailbox
- Unlimited archive email storage that does not use your primary mailbox quota.
- Messages can be moved to the archive automatically or manually.
- The Online Archive mailbox is easily accessible through Outlook on the web, and Microsoft Outlook 2013 and higher.
- Messages in the archive mailbox are easily searchable and viewable from any location
Moving messages to the Online Archive mailbox
Users can drag and drop messages from .pst files into the archive called Online Archive – "Your Email Address", for easy online access. Users can also move email items from the primary mailbox to the archive mailbox automatically, using Archive Polices, to reduce the size and improve the performance of the primary mailbox.
Users can import data to the archive in the following ways:
- Import data from a .pst file using Outlook's Import and Export wizard.
- Drag email messages from .pst files into the archive.
- Drag email messages from the primary mailbox into the archive.
- Let archive policies automatically move email messages from the primary mailbox, based on the age of the messages.
Setting up an Archive Policy using Outlook on the web
To set up an Archive Policy using Outlook on the web, proceed as follows.
- Login to your Outlook on the web account.
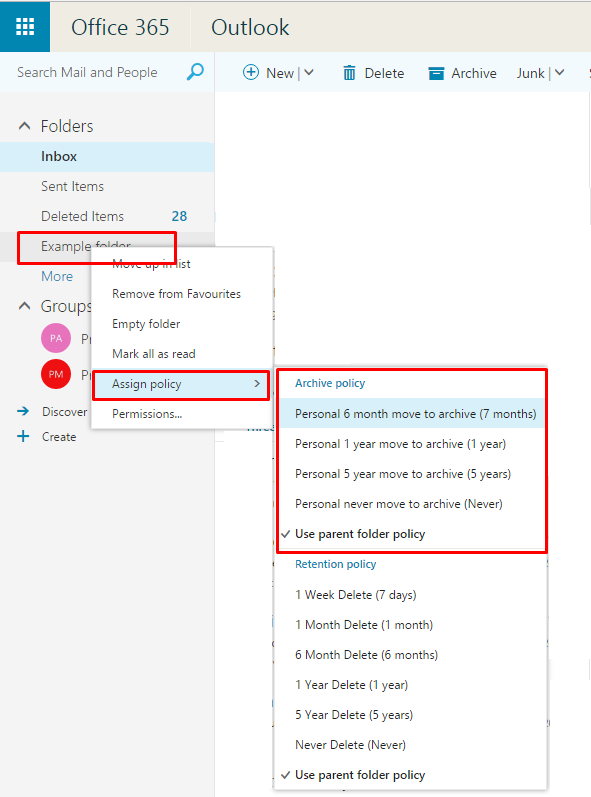
- In the list of Folders in the left hand pane, right-click the custom created folder to which you want to assign an archive policy. (In the screenshot below, this is the "Example folder").
- From the dropdown menu that appears, select Assign policy, to open a second dropdown menu, Archive policy.
- From the Archive policy dropdown menu, choose the archive policy you wish to apply. Choose from:
- Personal 6 month move to archive (7 months)
- Personal 1 year move to archive (1 year)
- Personal 5 year move to archive (5 year)
- Personal never move to archive (Never)
- Use parent folder policy
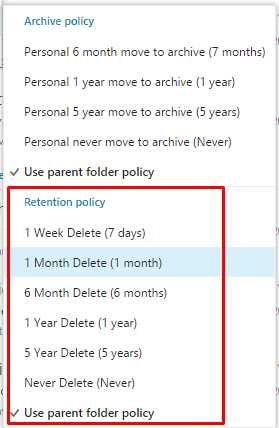
Note – Retention Policy:
Using the procedure above, from the Assign Policy dropdown options, you may also set a Retention Policy that will automatically delete messages in a custom folder.
Setting up an Archive Policy using Microsoft Outlook 2013 & 2016
To set up an Archive Policy using Microsoft Outlook 2013 or 2016, proceed as follows, from within Outlook.
- In the list of Favorites in the left hand pane, click the custom created folder to which you want to assign an archive policy. (In the screenshot below, this is the "Example folder").
- From the Outlook Ribbon, click the Folder tab.
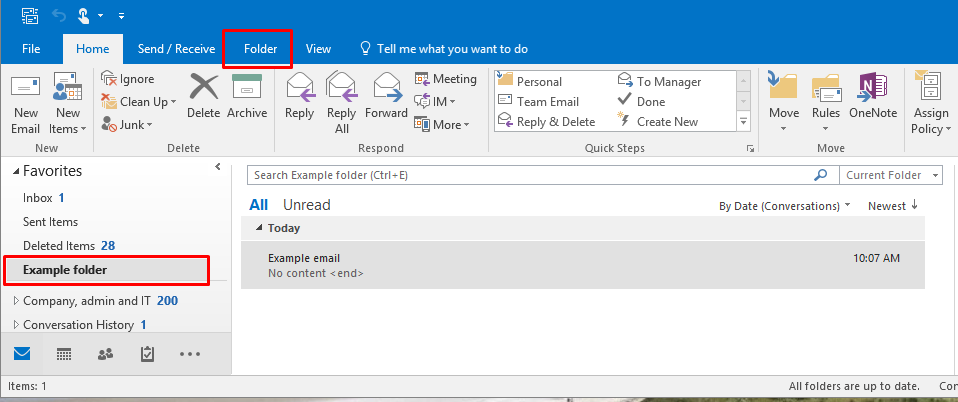
- From the Folder tab, click the Policy button.

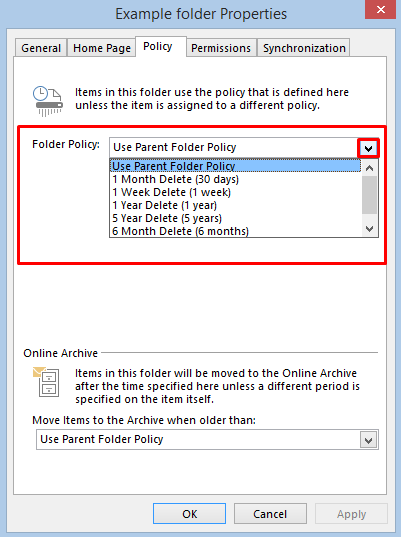
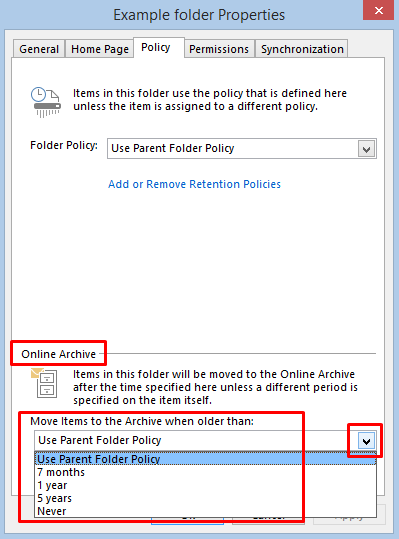
The chosen folder Properties dialogue box appears, open on the Policy tab.
- From the Online Archive dropdown menu, click on the archive policy you wish to apply. Choose from one of the following options; Move items (from your personal mailbox) to the Archive when older than:
- Use Parent Folder Policy
- 7 months
- 1 year
- 5 years
- Never
Note – Retention Policy:
Using the procedure above, from the Policy tab you may also set a Retention Policy that will automatically delete messages in a custom folder after a given period.
