Setting up Datto Workplace backup on a PC
Datto Workplace from Cloud Direct will automatically backup all your Microsoft Office, PDFs and similar popular document formats. If you prefer, you can skip the automatic backup selection during the product install, and hand-select folders and file types that you want backed up.
Note:
When you receive your new Datto Workplace login, your user account will have an allocated storage space. In some instances, this is not enough. Refer to knowledge article, KB0012260, How do I increase my Datto Workplace storage? if you wish to change the allocated storage memory for backup.
There are two ways to set up backup of your Datto Workplace folders and files:
Manage Backups is the generally preferred method because it allows easy selection of individual folders/files, or multiple files/folders, and also allows exclusion of specific files or file types in your backup. The Add Folder method is more limited in that it allows only individual folders to be added to the backup selection. This article describes how to set up backup using either method.
Setting up backup using Managed Folders
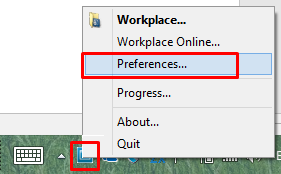
- From the System Tray, right click on your Datto Workplace icon, and select Preferences.
Your Datto Workplace Desktop opens.
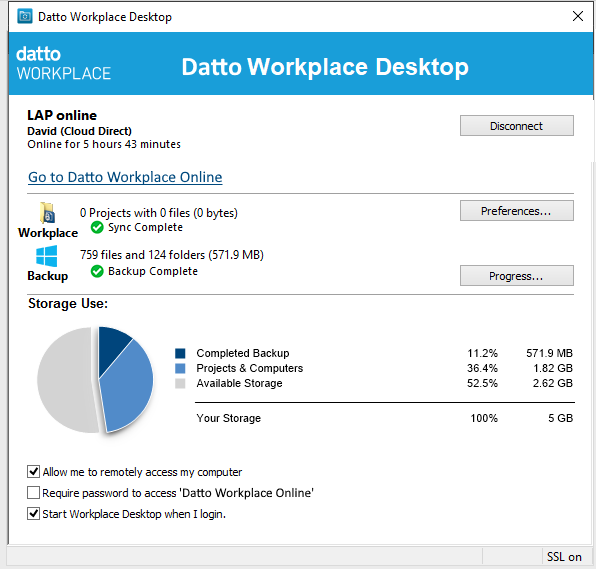
- Click the Preferences button.
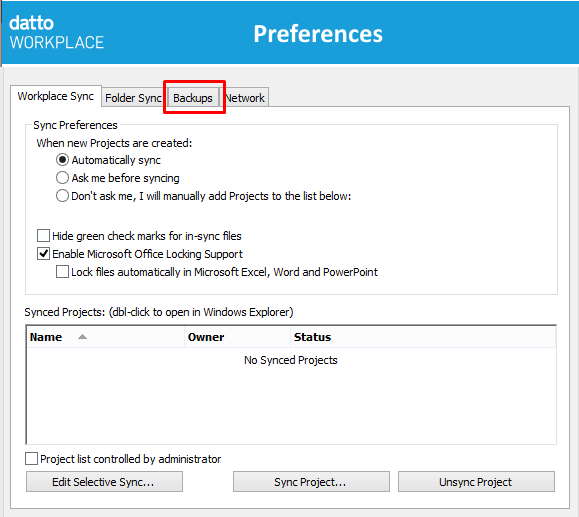
The Preferences page opens, on the Workplace Sync tab.
- Click the Backups tab.
The Backups page opens.
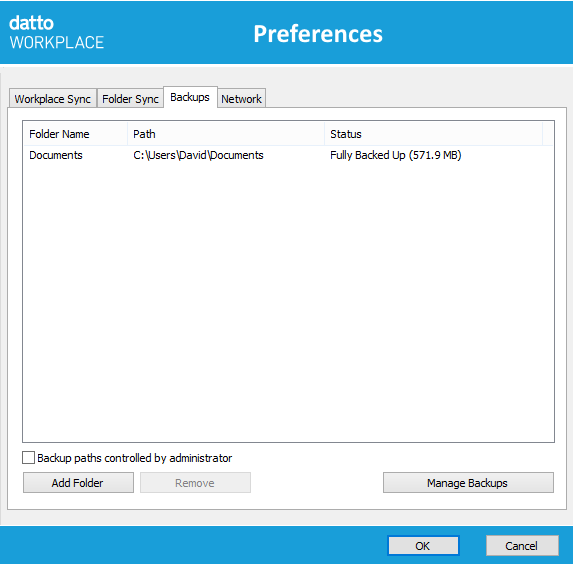
- Click the Manage Backups button in the bottom right-hand corner of the page.
The Manage Backups page opens.
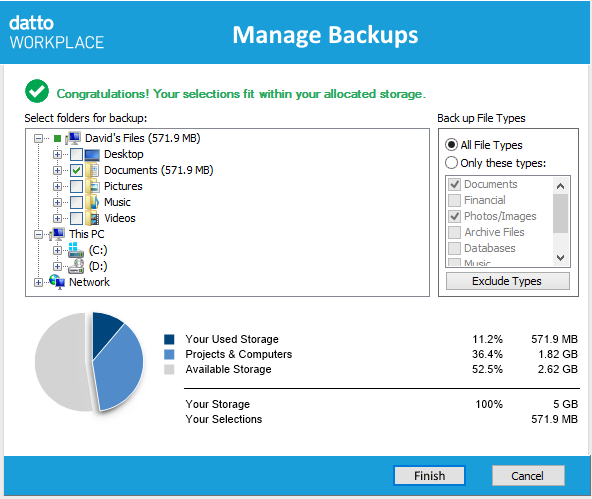
- From the list of folders in the left-hand pane, select the folders you wish to backup by ticking the required checkbox(es).
As you proceed through backup selection, a pie chart and table indicate how much of your allocated memory quota is being used for backup. A message, "Congratulations! Your selections fit within your allocated storage", confirms you are within your quota.
Note:
If you exceed your allocated quota, then either reduce the number of folders you are backing up, or increase your quota. Refer to knowledge article, KB0012260, How do I increase my Datto Workplace storage? for details of how to increase your quota.
By default, all file types will be backed up. If you wish to change the file types to be backed up, then proceed to Step 6. Otherwise, skip Step 6.
- To change the file types to be backed up, go to the Back up File Types pane.
- Click the Only these types radio button.
- Make your file type selections for backup by ticking appropriate checkboxes.
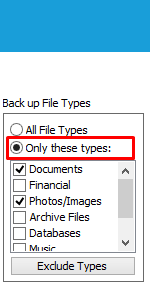
Only the selected file types will be backed up.
Alternatively, exclude certain file types from backup as follows:
- Click the Exclude Types button.
The Exclude Files page opens.
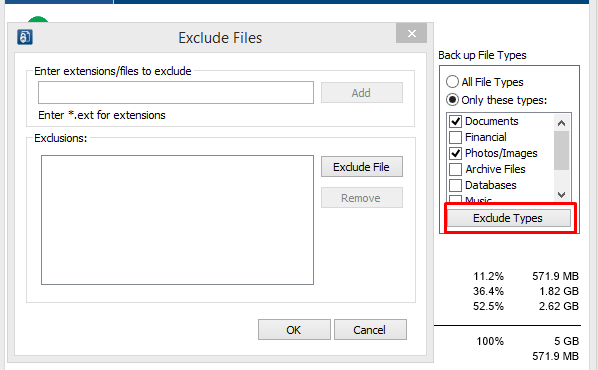
- In the Enter extensions/files to exclude field, exclude individual files, or all files with specific extensions, by typing the file name or the extension (in the format *.ext).
- Click OK.
These named files or extensions will be excluded from the backup. To remove an entry from the "Excluded Files" list, highlight the entry and click the Remove button.
- Click the Finish button to end your backup selection.
Your selected files and folders will now be protected by continuous backup.
Setting up backup using Add Folder
This alternative method to set up Workplace backup is restricted to only backing up one individual folder at a time.
To set up Workplace backup using the Add Folder method, proceed as follows.
- Follow Step 1 to Step 3 of the previous procedure, Setting up backup using Managed Folders, to arrive at the Backups page.

- Click the Add Folder button.
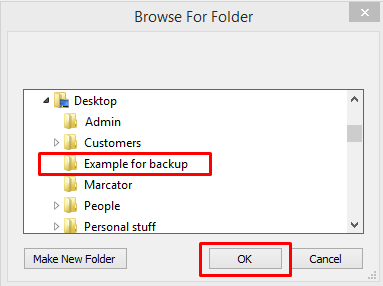
The Browse for folder page opens.
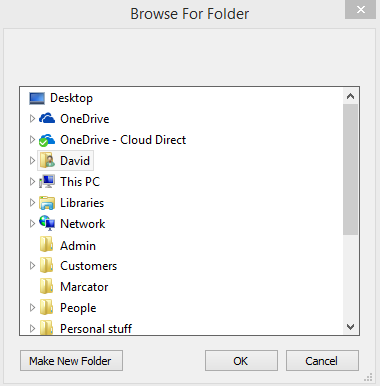
- Browse the folder tree to locate the folder you wish to include in your Datto Workplace backup.
- Select the required folder.
- Click OK.
The Backups page re-appears.
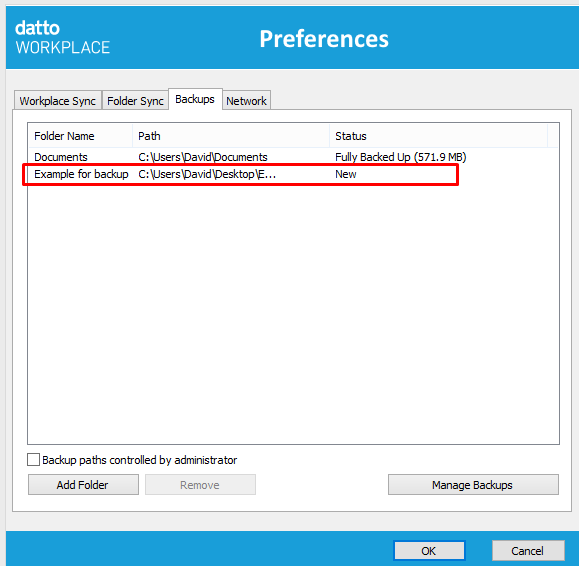
The selected folder is now included in the backup selection, and will be protected by continuous backup.


